Windows --> Linux #TheSwitch
AppImage was jetzt?
Problem
AppImages sind schwer zu verwalten.
Lösung:
AppImageLauncher installieren.
Damit kann ein Ordner festgelegt werden, in dem alle AppImages gespeichert werden. Um nun ein AppImage zu installieren, schiebt man es in den Ordner der von AppImageLauncher überwacht wird, um es zu deinstallieren löscht man es aus dem Ordner wieder raus.
Windows Key
WIN + Arrow
Problem
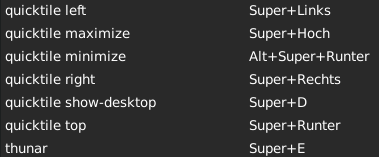
Beim wechsel von Windows zu Linux, fehlte mir der Shortcut WIN + Arrow um die Fenster an die Ränder anzupinnen. In Linux gibt es das nicht build in.
Lösung
- Installiere: https://github.com/ssokolow/quicktile
- Öffne Einstellungen -> Tastatur --> Tastenkürzel für Anwendungen
- Erstelle die Window Tastenkürzel:

Windows Key launch ULauncher/Whiskermenue
Problem:
Wenn Ulauncher oder das Whiskermenue auf die Windows Taste (Super Key) gebindet wird und gleichzeitig auch andere Shortcuts wie WIN+E oder WIN+Arrow verwendet werden, dann kann es "ghost" WIN Keydowns geben.
Lösung:
Mit kysuperkey kann ein Modifier bei tastendruck angewendet werden, oder bei einem einfachen klick
Installation: https://github.com/hanschen/ksuperkey
Konfiguration:
- Stelle in Ulauncher/Whiskermenue den shortcut auf
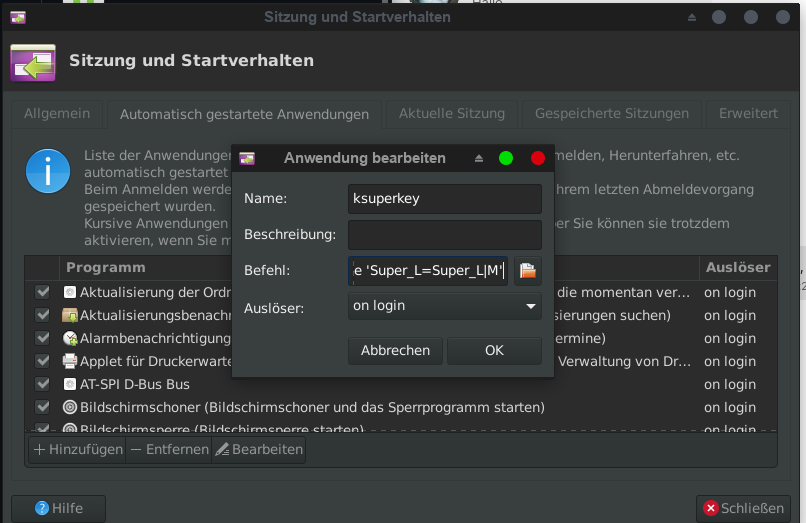
SUPER_L+M - Startverhalten (Autostart Manager) öffnen. --> In xfce im terminal mit folgendem Befehl:
xfce4-session-settings - Add new Autostart on Login mit dem Command:
ksuperkey -e 'Super_L=Super_L|M'
- Nach einem neuem Login, wird nun die Windowstaste wie in Windows funktionieren
XFCE
Windows Taskbar Like in XFCE
Problem
Die Windows Taskbar ist einzigartig, da man Favoriten anpinnen kann, indicatoren hat und weil man eine Minivorschau in der Taskleiste bekommt. Im Standart XFCE ist das NICHT möglich.
Lösung
Von: https://linuxhint.com/custom-dock-xfce/
This article will cover a guide on installing and using a custom dock application in the Xfce desktop environment. Acting as a window / task manager, you can use it to improve the look and feel of your Xfce desktop as well as improve productivity by enhancing window management and switching experience.
About Xfce Docklike Plugin
Docklike Plugin or Docklike Taskbar is a free and open source task manager that can be added to the Xfce panel like any other applet. You can use it as an alternative to the “Window Button” applet available by default in most Xfce based Linux distributions. It can also be configured to behave like a standalone dock app, similar to Plank dock and GNOME dock available in many Linux distributions. If you have used the “DockbarX” application in Xfce in past, you will find it pretty similar and it can be used as a drop-in replacement for it as DockbarX is now defunct.
The main features of Docklike Plugin include:
- Ability to pin applications on the dock as well as use them to switch between running application windows.
- Supports multiple monitors.
- Look and feel can be customized using built-in styles.
- Ability to set custom colors for the items visible in the applet.
- Ability to change the style of indicators for both focused and minimized windows.
- Pre-defined hotkeys to switch quickly between multiple windows.
- Ability to handle windows on more than one workspace.
- Ability to show live previews of running application windows.
- Ability to move the position of the window indicator to top, bottom, left, or right.
- Supports custom icon sizes.
- Ability to group running windows.
- Supports re-ordering of applications pinned or visible on the applet.
- Supports application quicklists in the right click menu.
- Ability to edit properties of pinned and running application launchers.
- Ability to change colors of active and inactive windows indicators.
- Supports a badge that shows the number of open instances of the same application.
- Supports dragging and dropping of files on tasks visible on the taskbar.
Installing Docklike Taskbar
To install Docklike Taskbar in Xubuntu, first run the following commands in succession to add a PPA repository:
$ sudo add-apt-repository ppa:xubuntu-dev/extras$ sudo apt updateNow run the following command to install Docklike Taskbar panel applet:
$ sudo apt install xfce4-docklike-pluginDocklike Taskbar may be available in default repositories of your Linux distribution. So you can install it by searching for it in the package manager. Otherwise you can follow further installation instructions available here.
Adding Docklike Taskbar to the Xfce Panel
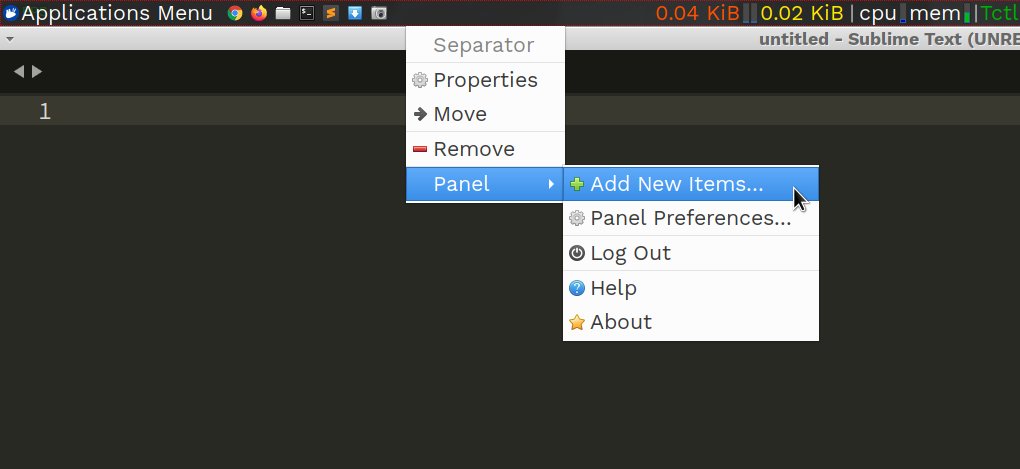
As Docklike Taskbar works as a panel applet, you need to add it to the Xfce panel for it to work properly. To do so, right click on the Xfce panel and click on the “Panel > Add New Items” menu option (as shown in the screenshot below).
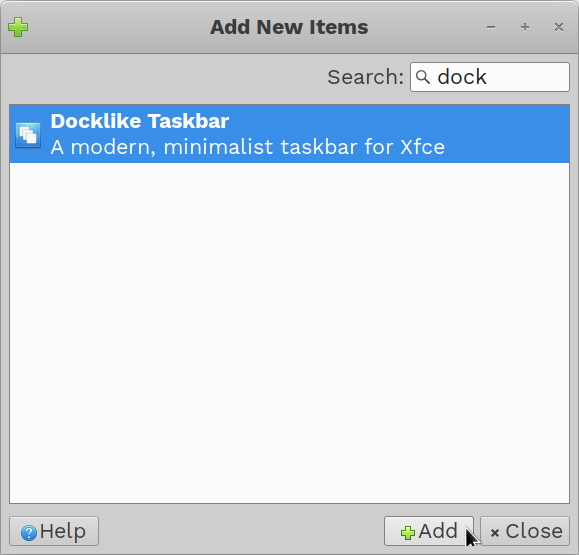
A new window will open. In the search box, enter the term “dock”, select the “Docklike Taskbar” entry and click on the “Add” button.
You should now have the Docklike Taskbar visible on the xfce panel and its layout should be similar to this.

Centering the Docklike Taskbar Applet and the Panel
You may want to center the Docklike Taskbar applet as well as the panel to make it behave like a dock. To do so, right click on the Xfce panel and click on “Panel Preferences”.
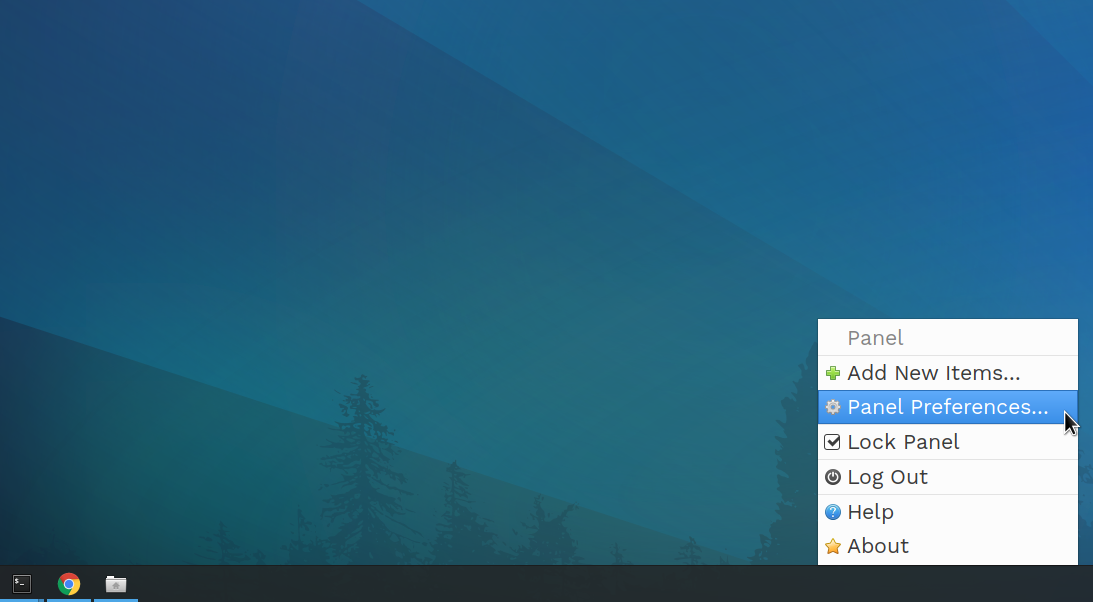
Make sure that the checkbox saying “Automatically increase the length” is checked. Reduce the “Length” slider to your desired value to center the dock.
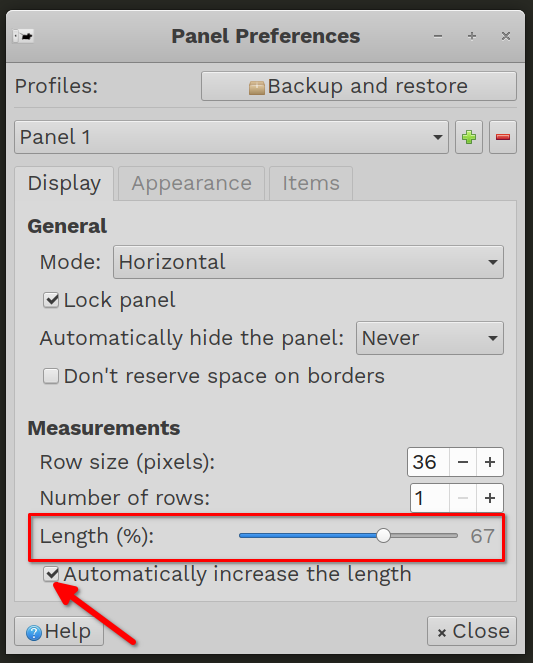
After making these changes, the Docklike Taskbar should look like this on your Xfce desktop.
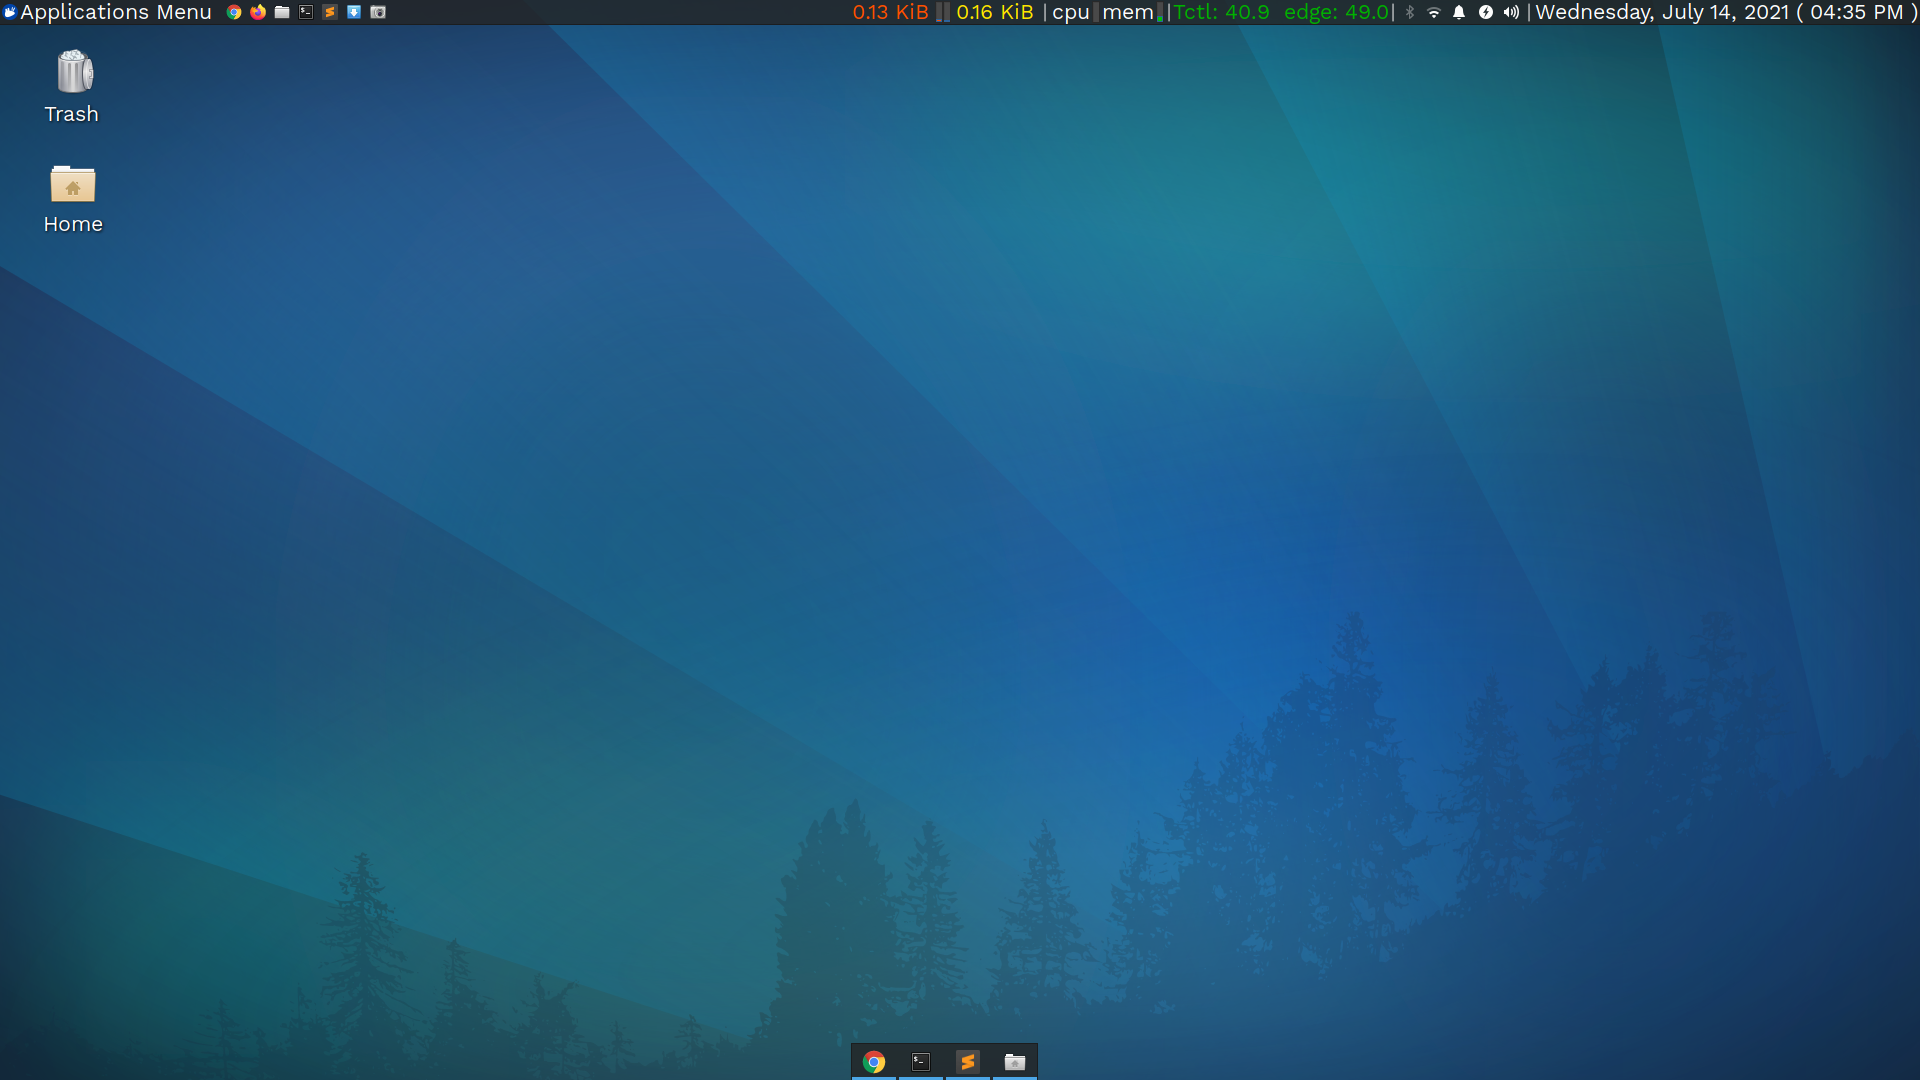
Pinning Applications on the Docklike Taskbar
To pin or mark certain applications as favorites on the Docklike Taskbar, just right click on an icon of a running application and click on “Pin to Dock” menu option.
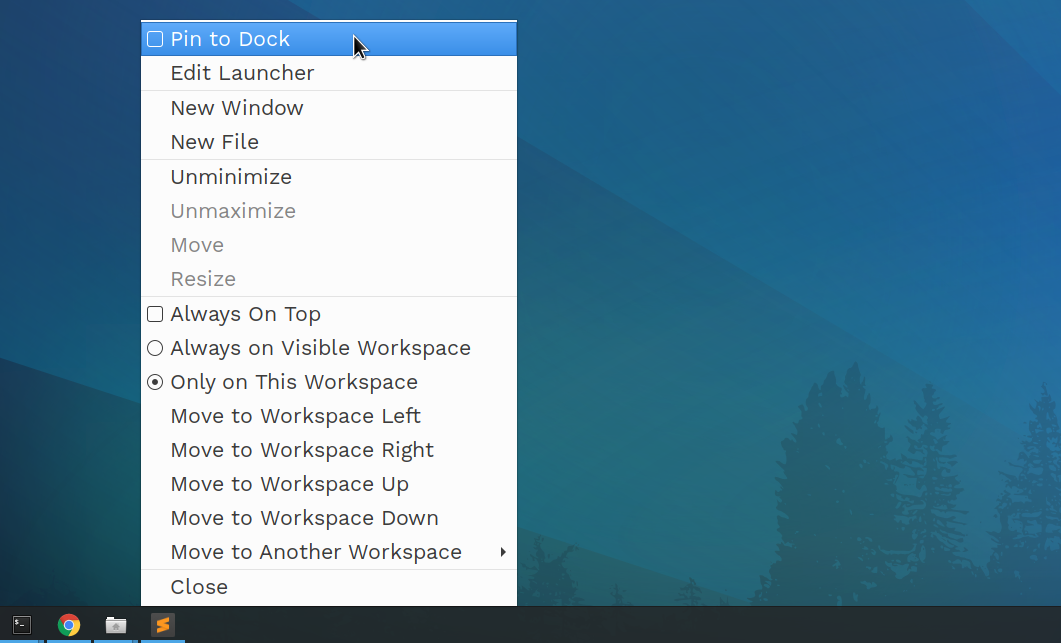
Pinned applications will act as application launchers as well as task switchers.
Changing the Preferences of the Docklike Taskbar
To change the preferences of the Docklike Taskbar, right click on the Xfce panel and click on “Panel Preferences”.
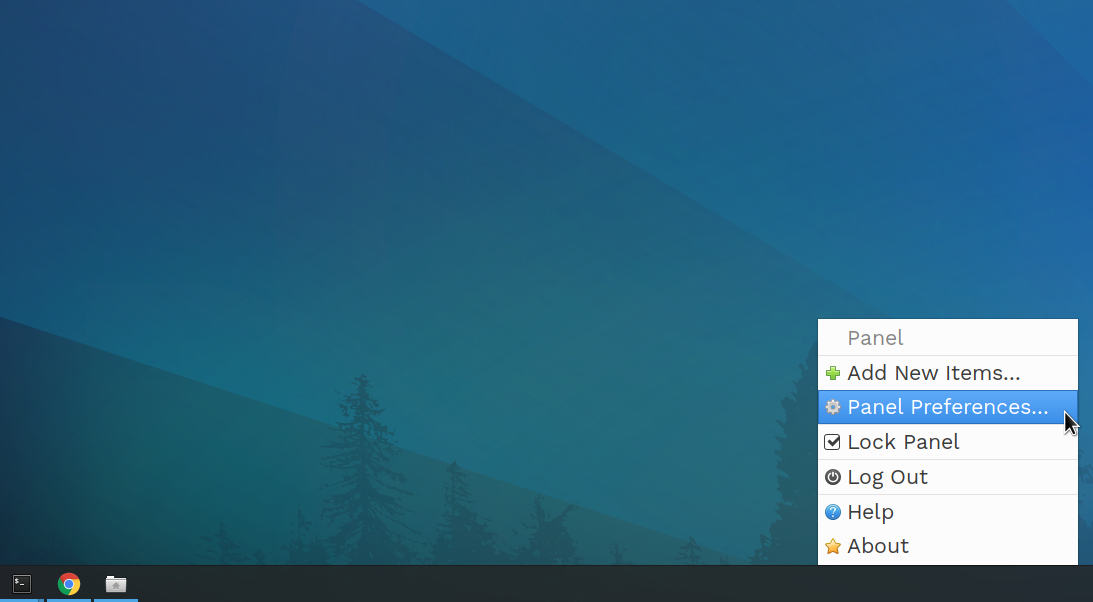
Go to the “Items” tab and highlight the “Docklike Taskbar” entry. Now click on the little cog icon located at bottom.
The preferences window should be now visible on your desktop.
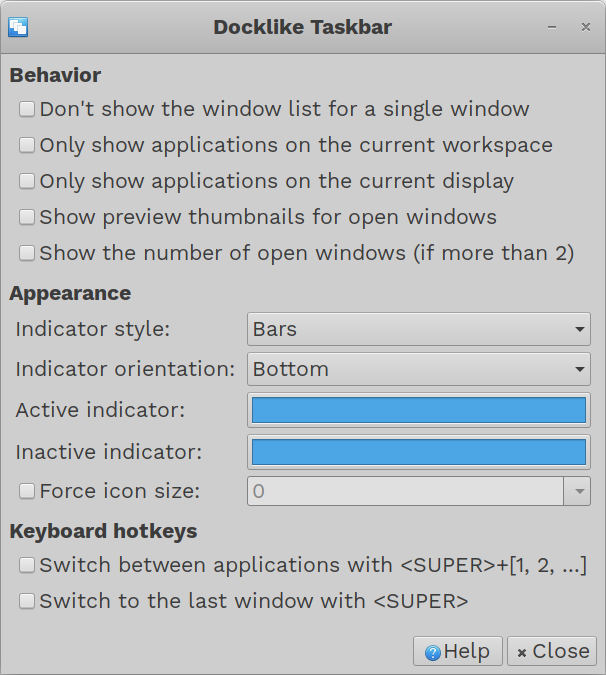
You can extensively customize the Docklike Taskbar from here and change its appearance as well. Any changes you make should be visible in real-time on your desktop.
Xfce-panel vor Fullscreen Apps bei Fokus verlust
Problem
Wenn Fullscreen eine Anwendung offen ist und diese den Focus verliert, dann ist das xfce-panel im Vordergrund.
Lösung
Ein Panel
Wenn nur ein einziges Panel vorhanden ist, kann dieser Script nach dem Login ausgeführt werden:
#!/bin/bash

# Wartet bis die Panels laden
while [ "$(wmctrl -l | grep -c xfce4-panel)" -lt "2" ];
do
   sleep 0.05s
done


# Identifier bekommen
ID=$(wmctrl -l | grep xfce4-panel | sed 3p | awk '{ print $1 }' | head -1)
# Panel wird auf Desktop Ebene gesetzt
wmctrl -i -r $ID -b add,below
Mehrere Panels
Wenn es mehrere Panels gibt, muss von jedem die ID bekannt sein. Um die ID's zu bekommen, kann folgender Befehl ausgeführt werden: wmctrl -l | grep xfce4-panel | sed 3p | awk '{ print $1 }'
Beispiel mit 4 Panels mit den ID's: 0x00c00003; 0x00c0000f; 0x00c00014; 0x00c00019
#!/bin/bash

# Wartet bis die Panels laden
while [ "$(wmctrl -l | grep -c xfce4-panel)" -lt "2" ];
do
   sleep 0.05s
done

# Panel wird auf Desktop Ebene gesetzt
wmctrl -i -r 0x00c00003 -b add,below
wmctrl -i -r 0x00c0000f -b add,below
wmctrl -i -r 0x00c00014 -b add,below
wmctrl -i -r 0x00c00019 -b add,below
Games
Game Launcher in Linux
- Steam
- Lutris -> GOG, Ubisoft, Origin, Steam, Amazon Games, Manuell
- Heroic -> Epic
Zoom
Kamera Virtueller Hintergrund
Problem
Wenn in Zoom ein Virtueller Hintergrund eingestellt wird, dann wird nur ein schwarzes Kamerabild übertragen. Somit funktioniert die Kamera nur ohne Virtuellen Hintergrund.
Lösung
https://github.com/fangfufu/Linux-Fake-Background-Webcam
Python 3 wird benötigt
Mein Weg zur Lösung
sudo rmmod -r v4l2loopback
sudo apt-get remove v4l2loopback-dkms
sudo apt-get install dkms linux-headers-`uname -r`

git clone https://github.com/umlaeute/v4l2loopback.git
cd v4l2loopback
sudo cp -R . /usr/src/v4l2loopback-1.1
sudo dkms add -m v4l2loopback -v 1.1
sudo dkms build -m v4l2loopback -v 1.1
sudo dkms install -m v4l2loopback -v 1.1
sudo modprobe v4l2loopback
Starten der Fake Backgroud Webcam
# Blur Hintergrund
python3 fake.py --background-blur 41 --no-background --no-foreground -F 60 --use-sigmoid --background-mask-update-speed 10

# Eigener Hintergrund
python3 fake.py -b /path/to/image.jpeg --no-foreground